HackFu 2015 – The Badgening
Flashback to August 2014. Planning for HackFu 2015 is well underway:
Alec: Hmm, maybe HackFu could use a bit of DefCon-style badge hacking..?
Martyn (MWR): Can we do something cool for £10-£20 per badge? Max 100.
Alec: No problem.
Fast-forward to June 2015, skipping out many months of design, construction, frustration, late nights and burned fingers:
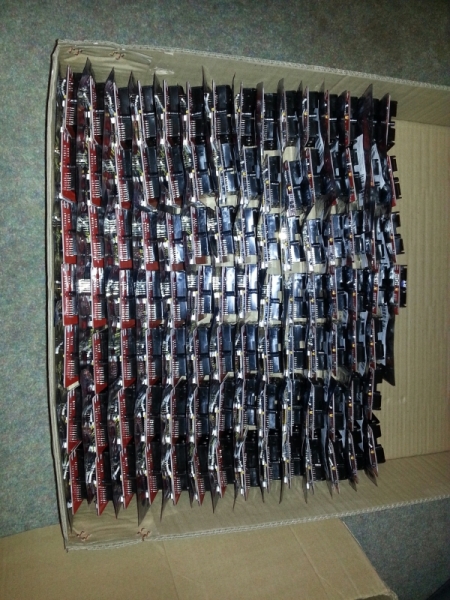
What you see here is a box containing 102 of these:
More pics from the event can be found on MWR’s Facebook page, and there’s a video report from the event courtesy of SC Magazine.
Here’s the spec of the badge:
- Ciseco/WirelessThings RFu-328 Arduino-compatible radio transceiver
- 3.3v TC1015 PowerPOD power regulator
- 1.8 inch colour TFT display, 128×160 resolution
- SD card slot
- 5-way joystick
- Serial port
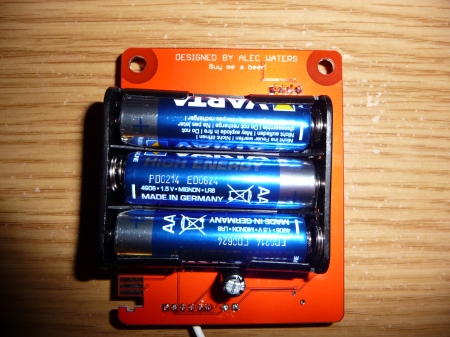
- 3xAA battery box
- I2C edge connector. More on that later on.
- Hackable gameplay! More on that later on, too.
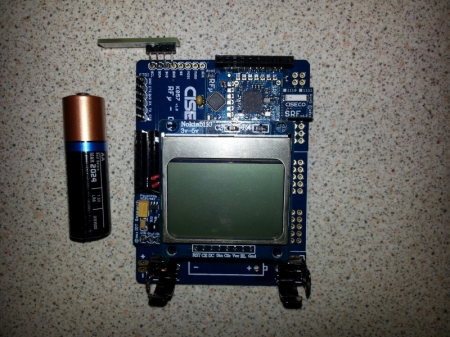
It’s a long way from the prototype:
This is based on an RFu development board and a Nokia 5110 mono LCD (48×84 resolution).
The venue for HackFu 2015 was ex-HM Prison Ashwell, closed in 2011 and now run by The Gaol Events as an urban airsoft site. The venue was chosen to match HackFu’s theme – the premise was that all of MWR (and guests!) were incarcerated, as some of them were suspected of being involved in plotting acts of cyber-nastiness. The name of the game was to identify the guilty and exonerate the innocent, although I’m not sure how many of these people look innocent:
So how did the badges fit into the gameplay? They had two primary functions:
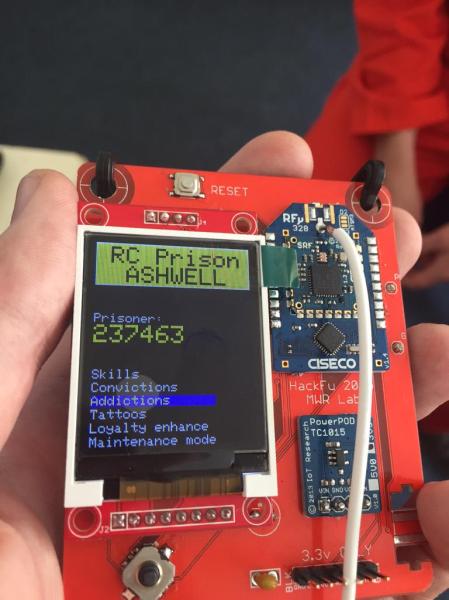
- They contained each prisoner’s characteristics – their convictions, addictions, skills, and tattoos. You can see this on the menu screen on the picture above.
- They allowed the prison to track the inmates around the venue by means of their on-board SRF radio modules. There were three base stations around the prison which would “ping” each badge in turn. A reply from a badge equated to “loyalty” (because you’ve not absconded) and increased a global loyalty score for all the teams combined. At different point levels, new areas of the venue became accessible and rewards were given (“party” and “free booze” being two of them!)
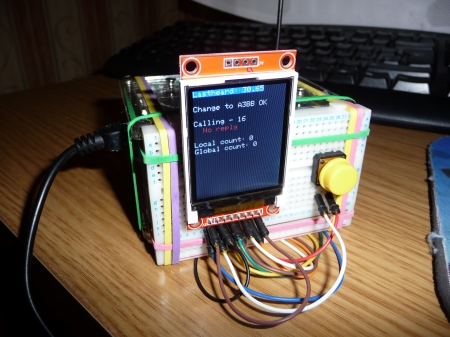
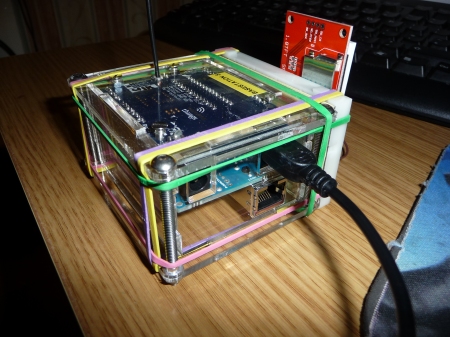
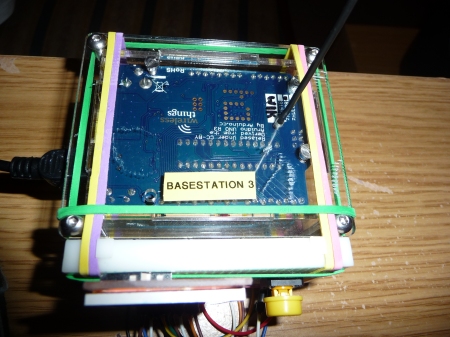
The base stations looked like this, and comprised a WirelessThings Xino-RF, an Arduino ethernet shield, a clear acrylic enclosure, and some elastic bands:
It’s “upside down” in the enclosure so that I could have a wire whip antenna poking out. The ethernet shield is so that the base station can call web services on the game network to register the presence of the badges.
There were dozens of challenges for the inmates to attempt – the reward for successful completion of each wasn’t points (as usual), it was a clue to the identity of one of the guilty parties. Clues were of the form “the mole does not have a conviction for Racketeering”, or “the mole does not have a tattoo of tempura battered prawn” – this meant knowing all of the prisoner characteristics for all of the badges (even those of people on other teams) was critical to success. Now, you could just go around and ask everyone what’s on their badges, or perhaps you could find another way to get the information that doesn’t involve bartering with other teams…
The final menu item on the badge is “Maintenance Mode”. Selecting it shows you some stats and config about the radio module; it also warns you that the radio is inactive – this means it’s no longer responding to polls and is no longer contributing to the overall loyalty score (this is Bad! Remember there’s a party and booze at stake!)
Why is the radio inactive? The SRF module on the RFu board is attached to the “Arduino’s” serial port – if you want to talk to the Arduino, you have to turn off the radio – you can’t do both at the same time. If the inmates connected to the serial port whilst in Maintenance Mode they were presented with a request to enter a PIN – the challenge here is to write a simple brute-forcer that would operate over the serial port.
The reward for getting the PIN is a download of a “badge toolkit”. This consisted of a Python script and a dissector for Wireshark written in Lua. The purpose of the script was to allow the teams to use their issued SRF-Stick USB radios to sniff the radio network and have Wireshark parse the packets. I was using the RadioHead Packet Radio library – the badges would listen for RHReliableDatagrams (sent via the RH_Serial class), send an ack back to the sender, and act on the contents.
The problem here was that the stick could only see traffic to team’s own badges – the SRF supports the concept of logical separation of traffic via a PANID, and each team had their own (think of PANIDs like VLANs on an ethernet switch). If the teams looked at the contents of the Python script they’d find a simple tweak they could make. The script put the SRF into ATZD1 mode, allowing it to hexdump all traffic on its configured PANID. Commented out was a line which put it into ATZD2 mode instead – this hexdumps traffic on all PANIDs.
So now the teams can see all the traffic; if they look into the Lua dissector, they’ll see all of the message types the badge supports:
- ping – this is the standard “are you there” message sent by the prison
- IDNUM – causes the badge to output the prisoner ID number over the radio net
- SKILLx – causes the badge to output skill number X over the radio net
- CONVIx – same for conviction X
- TATTOx – same for tattoo X
- ADDICx – same for addiction X
- CHPIDx – causes the badge to swap PANIDs (i.e., cause a badge to “change teams”)
So, how does one send one of these messages? Inside the badge toolkit zipfile was a file called .gitignore. Which most people ignored. Because it’s .gitignore. Except it wasn’t – it was another Python script that allowed the user to send a ping to a badge and included all the necessary code to calculate the packet’s CRC. This could then be modified to send any of the other messages, with the results captured in Wireshark. Now the teams can start harvesting prisoner characteristics from all badges, and the answers to the other challenges will make sense.
So what’s the CHPID message for? Why cause a badge to change PANID? Changing PANID will also cause the badge to change the primary colour of the display – each team has their own colour and PANID, and if you change PANID the badge will change colour to match.
It turns out there’s a side benefit to accruing loyalty points, namely cold, hard cash. At the end of every sweep, the prison would work out how many badges were present and which PANIDs they were on. Money was then distributed to each team captain based on the number of badges seen on their team’s PANID. If you can command a badge to change its PANID to yours, that gets more money for your team. Cue “Badge Wars”, where people’s badges were rapidly changing colour as teams vied for control!
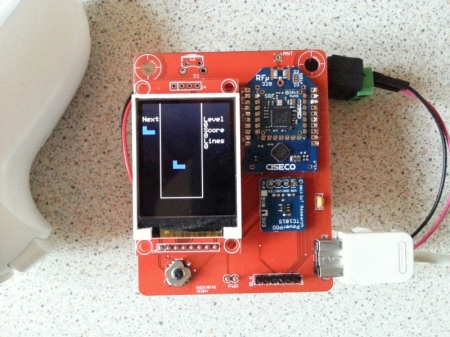
So what about the “Loyalty Enhance” menu option? Selecting it merely says “Enhancer not found”, with no other clue as to its purpose. However, one of the items on sale at the HackFu shop was a “nunchuk” (note singular, not plural). Purchasing one of these gave you a Wii Nunchuk, and connecting this to the edge connector made Loyalty Enhance do this:
By levelling-up in Tetris your badge’s response to a prison poll counted for more (a “loyalty multiplier” if you like) – up to sixteen times more if you played it for long enough, potentially allowing a team to reap huge rewards. But there weren’t many Nunchuks to go around, and it takes ages to get to that kind of level in the game. Surely there’s an easier way?
“Easier” probably isn’t the right word, but the Yellow Team (the “Framed Packets”) figured it out. At the peak of their activities, they were netting over £30,000 of in-game currency per hour – you can read about how they did it here. Extra credit also goes to the Green Team (the “Barred Coders”) for downloading the firmware from the badge, removing all the troublesome CHPID and SKILL/etc commands, and reflashing their patched code. Credit goes to all of the teams for their efforts – they all dug deep.
Lessons learned
This was the first time I’d designed a board and made something “proper”. There were a few things I picked up along the way:
- Make sure you get the Eagle files right before sending them off to the board house! My first run of boards had the four pins at the top of the display 180 degrees out, preventing the use of the SD card slot.
- Test the boards when you get them back, and before you solder any components on. Some of my boards had dodgy soldermask, much as you see here. It’s quite frustrating to discover this later rather than sooner, but that’s what sometimes happens when you use a cheap Chinese board house (although apart from a few dodgy ones, the boards and the service from DirtyPCBs represented excellent value for money!)
- Get a Panavise Jr! Assembling over 100 boards without one would have been more torture than it actually was.
- Don’t do something so monumentally daft as committing yourself to a project that involves making over 7,000 hand-soldered joints (each badge has 70 joints) 🙂
At the end of this year’s event, I was issued an instruction for HackFu 2016 – “come up with something awesome”. Hmmm, let’s think…

17 June, 2015 at 11:31
[…] Via:: wirewatcher […]